Sometimes the standard Alert Dialog just doesn’t meet your needs. It’s not difficult to create a custom alert, though. This post will show you a minimal example. When we’re done, you can follow the same procedure to add any layout you want.
Create a custom layout
A layout with anEditText is used for this simple example, but you can replace it with anything you like.
custom_layout.xml
<?xml version="1.0" encoding="utf-8"?>
<androidx.constraintlayout.widget.ConstraintLayout
    xmlns:android="http://schemas.android.com/apk/res/android"
    xmlns:app="http://schemas.android.com/apk/res-auto"
    android:layout_width="match_parent"
    android:layout_height="match_parent"
    android:padding="16dp">

    <com.google.android.material.textfield.TextInputLayout
        style="@style/Widget.MaterialComponents.TextInputLayout.OutlinedBox"
        android:id="@+id/edit_message"
        android:layout_width="match_parent"
        android:layout_height="wrap_content"
        android:hint="Message"
        app:layout_constraintStart_toStartOf="parent"
        app:layout_constraintEnd_toEndOf="parent"
        app:layout_constraintTop_toTopOf="parent">

        <com.google.android.material.textfield.TextInputEditText
            android:layout_width="match_parent"
            android:layout_height="wrap_content" />

    </com.google.android.material.textfield.TextInputLayout>

</androidx.constraintlayout.widget.ConstraintLayout>
Use the dialog in code
UsesetView to assign the custom layout to the AlertDialog.Builder
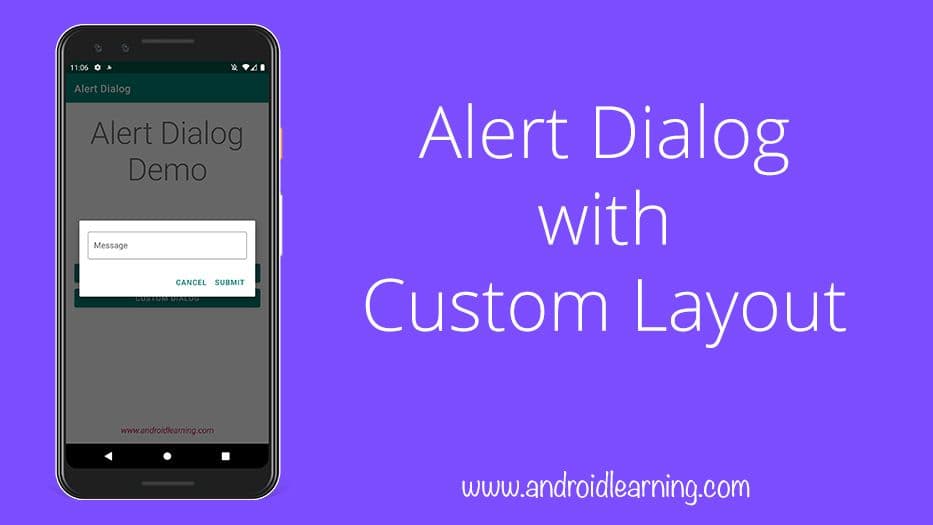
This is the full code from the example project shown in the image above:
MainActivity.java
View customLayout = LayoutInflater.from(MainActivity.this).inflate(R.layout.custom_dialog, null);

final TextInputLayout editMessage = customLayout.findViewById(R.id.edit_message);

AlertDialog.Builder builder = new AlertDialog.Builder(MainActivity.this)
        .setView(customLayout)
        .setPositiveButton("Submit", new DialogInterface.OnClickListener() {
            @Override
            public void onClick(DialogInterface dialogInterface, int i) {
                String message = Objects.requireNonNull(editMessage.getEditText()).getText().toString();

                // Dismiss Dialog
                dialogInterface.dismiss();

                Toast.makeText(MainActivity.this, message, Toast.LENGTH_SHORT).show();
            }
        })
        .setNegativeButton("Cancel", new DialogInterface.OnClickListener() {
            @Override
            public void onClick(DialogInterface dialogInterface, int i) {
                dialogInterface.cancel();
            }
        });
builder.show();
Or you can use above code in Kotlin
val customLayout = LayoutInflater.from(this@MainActivity).inflate(R.layout.custom_dialog, null)

val editMessage: TextInputLayout = customLayout.findViewById(R.id.edit_message)

val builder = AlertDialog.Builder(this@MainActivity)
        .setView(customLayout)
        .setPositiveButton("Submit") { dialogInterface, _ ->
            val message = editMessage.editText!!.text.toString()

            // Dismiss Dialog
            dialogInterface.dismiss()

            Toast.makeText(this@MainActivity, message, Toast.LENGTH_SHORT).show()
        }
        .setNegativeButton("Cancel") { dialogInterface, _ -> dialogInterface.cancel() }
builder.show()
Notes
- If you find yourself using this in multiple places, then consider making a
DialogFragmentsubclass. We will post an article about DialogFragment.
Download Full Source Codes
Download Project
Enter your email to unlock the download.