In this tutorial, we will upload multiple images to server using Retrofit Library.
Creating Server Side Codes
- Go to your server’s root directory (c:/wamp/www) and create a new folder. I created UploadImage.
- Inside the folder create a folder named uploads, in this folder, we will save all the uploaded images.
- Create a file named upload.php and write the following code.
<?php
// Path to move uploaded files
$target_path = dirname(__FILE__).'/uploads/';
$size = $_POST['size'];
if (!empty($_FILES)) {
    for ($x = 0; $x < $size; $x++) {
        try {
            $newname = date('YmdHis',time()).mt_rand().'.jpg';
            // Throws exception incase file is not being moved
            if (!move_uploaded_file($_FILES['image'.$x]['tmp_name'], $target_path .$newname)) {
                // make error flag true
                echo json_encode(array('status'=>'fail', 'message'=>'could not move file'));
            }
            // File successfully uploaded
            echo json_encode(array('status'=>'success', 'message'=>'File Uploaded'));
        } catch (Exception $e) {
            // Exception occurred. Make error flag true
            echo json_encode(array('status'=>'fail', 'message'=>$e->getMessage()));
        }
    }
} else {
    // File parameter is missing
    echo json_encode(array('status'=>'fail', 'message'=>'Not received any file'));
}
Create Android Project
- Open Android Studio and create a project. How to create an android project?
- Now open Build.gradle file of app directory and add Retrofit2’s compile dependency as shown below :
implementation 'com.squareup.retrofit2:retrofit:2.6.0' implementation 'com.squareup.retrofit2:converter-gson:2.6.0' - Add Glide library for showing selected images
implementation 'com.github.bumptech.glide:glide:4.10.0'
annotationProcessor 'com.github.bumptech.glide:compiler:4.10.0'
- Complete dependencies block:
dependencies { implementation fileTree(include: ['*.jar'], dir: 'libs') testImplementation 'junit:junit:4.12' androidTestImplementation 'androidx.test.ext:junit:1.1.1' androidTestImplementation 'androidx.test.espresso:espresso-core:3.2.0' implementation 'androidx.appcompat:appcompat:1.1.0' implementation 'com.google.android.material:material:1.0.0' implementation 'androidx.constraintlayout:constraintlayout:1.1.3' implementation 'com.squareup.retrofit2:retrofit:2.6.2' implementation 'com.squareup.retrofit2:converter-gson:2.6.2' implementation 'com.github.bumptech.glide:glide:4.10.0' annotationProcessor 'com.github.bumptech.glide:compiler:4.10.0' } - Now click on Sync Now or Sync Project With Gradle Icon from the top menu
- Now create the following layout with below codes.

<?xml version="1.0" encoding="utf-8"?> <androidx.constraintlayout.widget.ConstraintLayout xmlns:android="http://schemas.android.com/apk/res/android" xmlns:app="http://schemas.android.com/apk/res-auto" android:layout_width="match_parent" android:layout_height="match_parent" android:padding="16dp"> <TextView android:id="@+id/textView" android:layout_width="wrap_content" android:layout_height="wrap_content" android:text="Upload Multiple Files" android:textColor="#000" android:textAppearance="@style/TextAppearance.MaterialComponents.Headline5" app:layout_constraintTop_toTopOf="parent" app:layout_constraintStart_toStartOf="parent" app:layout_constraintEnd_toEndOf="parent"/> <com.google.android.material.button.MaterialButton android:id="@+id/btnChoose" android:layout_width="wrap_content" android:layout_height="wrap_content" android:layout_marginTop="10dp" android:text="Choose Image" app:layout_constraintStart_toStartOf="parent" app:layout_constraintTop_toBottomOf="@id/textView" app:layout_constraintEnd_toStartOf="@id/btnUpload"/> <com.google.android.material.button.MaterialButton android:id="@+id/btnUpload" android:layout_width="wrap_content" android:layout_height="wrap_content" android:layout_marginTop="10dp" android:text="Upload" app:layout_constraintStart_toEndOf="@id/btnChoose" app:layout_constraintTop_toBottomOf="@id/textView" app:layout_constraintEnd_toEndOf="parent"/> <ProgressBar android:id="@+id/progressBar" android:layout_width="wrap_content" android:layout_height="wrap_content" android:layout_marginTop="10dp" android:visibility="gone" app:layout_constraintStart_toEndOf="@id/btnChoose" app:layout_constraintTop_toBottomOf="@id/textView" app:layout_constraintEnd_toEndOf="parent"/> <ListView android:id="@+id/listView" android:layout_width="match_parent" android:layout_height="0dp" android:layout_marginTop="15dp" app:layout_constraintTop_toBottomOf="@id/btnChoose" app:layout_constraintBottom_toBottomOf="parent" app:layout_constraintStart_toStartOf="parent" app:layout_constraintEnd_toEndOf="parent"/> </androidx.constraintlayout.widget.ConstraintLayout> - Now connect ListView, Buttons, and Progressbar to activity.
public class MainActivity extends AppCompatActivity { ... private ListView listView; private ProgressBar mProgressBar; private MaterialButton btnChoose, btnUpload; ... @Override protected void onCreate(Bundle savedInstanceState) { super.onCreate(savedInstanceState); setContentView(R.layout.activity_main); ... listView = findViewById(R.id.listView); mProgressBar = findViewById(R.id.progressBar); btnChoose = findViewById(R.id.btnChoose); btnUpload = findViewById(R.id.btnUpload); ... } - Create Image Chooser and Runtime Permission to choose image button. Learn Runtime Permission.
btnChoose.setOnClickListener(v -> { // Display the file chooser dialog if (Build.VERSION.SDK_INT >= Build.VERSION_CODES.M) { askForPermission(); } else { showChooser(); } }); ... private void showChooser() { Intent intent = new Intent(Intent.ACTION_GET_CONTENT); intent.setType("image/*"); intent.putExtra(Intent.EXTRA_ALLOW_MULTIPLE, true); intent.addCategory(Intent.CATEGORY_OPENABLE); startActivityForResult(intent, REQUEST_CODE_READ_STORAGE); } ... @Override protected void onActivityResult(int requestCode, int resultCode, Intent resultData) { super.onActivityResult(requestCode, resultCode, resultData); if (resultCode == RESULT_OK) { if (requestCode == REQUEST_CODE_READ_STORAGE) { if (resultData != null) { if (resultData.getClipData() != null) { int count = resultData.getClipData().getItemCount(); int currentItem = 0; while (currentItem < count) { Uri imageUri = resultData.getClipData().getItemAt(currentItem).getUri(); currentItem = currentItem + 1; Log.d("Uri Selected", imageUri.toString()); try { arrayList.add(imageUri); MyAdapter mAdapter = new MyAdapter(MainActivity.this, arrayList); listView.setAdapter(mAdapter); } catch (Exception e) { Log.e(TAG, "File select error", e); } } } else if (resultData.getData() != null) { final Uri uri = resultData.getData(); Log.i(TAG, "Uri = " + uri.toString()); try { arrayList.add(uri); MyAdapter mAdapter = new MyAdapter(MainActivity.this, arrayList); listView.setAdapter(mAdapter); } catch (Exception e) { Log.e(TAG, "File select error", e); } } } } } } - Create a Base Adapter for showing multiple images in the list
public class MyAdapter extends BaseAdapter { private Context context; private ArrayList<Uri> arrayList; ... @Override public View getView(int position, View convertView, ViewGroup parent) { LayoutInflater mInflater = LayoutInflater.from(context); if (mInflater != null) { convertView = mInflater.inflate(R.layout.list_items, parent, false); } ImageView imageView = convertView.findViewById(R.id.imageView); TextView imagePath = convertView.findViewById(R.id.imagePath); imagePath.setText(FileUtils.getPath(context, arrayList.get(position))); Glide.with(context) .load(arrayList.get(position)) .into(imageView); return convertView; } .... } - Create a layout for the list
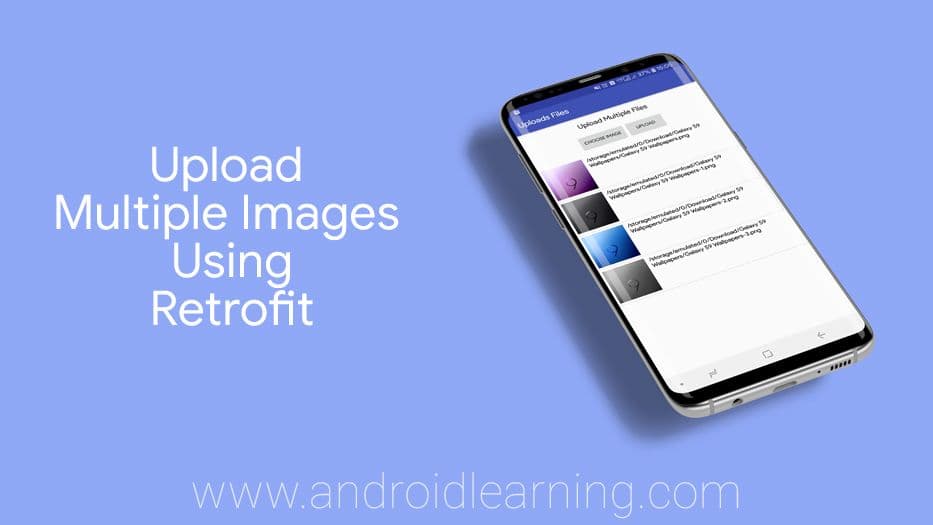
<?xml version="1.0" encoding="utf-8"?> <androidx.constraintlayout.widget.ConstraintLayout xmlns:android="http://schemas.android.com/apk/res/android" xmlns:app="http://schemas.android.com/apk/res-auto" android:layout_width="match_parent" android:layout_height="wrap_content" android:padding="10dp"> <ImageView android:id="@+id/imageView" android:layout_width="90dp" android:layout_height="90dp" android:contentDescription="ImageView" app:layout_constraintStart_toStartOf="parent" app:layout_constraintTop_toTopOf="parent"/> <TextView android:id="@+id/imagePath" android:layout_width="0dp" android:layout_height="wrap_content" android:layout_marginStart="10dp" android:textAppearance="@style/TextAppearance.MaterialComponents.Subtitle1" android:textColor="#000" app:layout_constraintStart_toEndOf="@id/imageView" app:layout_constraintTop_toTopOf="parent"/> </androidx.constraintlayout.widget.ConstraintLayout> - Upload Images to the server with Retrofit
btnUpload.setOnClickListener(v -> uploadImagesToServer());
- Create Retrofit client
Retrofit retrofit = new Retrofit.Builder() .baseUrl(ApiService.BASE_URL) .addConverterFactory(GsonConverterFactory.create()) .build(); // create list of file parts (photo, video, ...) List<MultipartBody.Part> parts = new ArrayList<>(); // create upload service client ApiService service = retrofit.create(ApiService.class); if (arrayList != null) { // create part for file (photo, video, ...) for (int i = 0; i < arrayList.size(); i++) { parts.add(prepareFilePart("image"+i, arrayList.get(i))); } } // create a map of data to pass along RequestBody description = createPartFromString("www.androidlearning.com"); RequestBody size = createPartFromString(""+parts.size()); // finally, execute the request Call<ResponseBody> call = service.uploadMultiple(description, size, parts); call.enqueue(new Callback<ResponseBody>() { @Override public void onResponse(@NonNull Call<ResponseBody> call, @NonNull Response<ResponseBody> response) { ..... } @Override public void onFailure(@NonNull Call<ResponseBody> call, @NonNull Throwable t) { ..... } }); - Convert String and File to Multipart for Retrofit Library
@NonNull private RequestBody createPartFromString(String descriptionString) { return RequestBody.create(MediaType.parse(FileUtils.MIME_TYPE_TEXT), descriptionString); } @NonNull private MultipartBody.Part prepareFilePart(String partName, Uri fileUri) { // use the FileUtils to get the actual file by uri File file = FileUtils.getFile(this, fileUri); // create RequestBody instance from file RequestBody requestFile = RequestBody.create (MediaType.parse(FileUtils.MIME_TYPE_IMAGE), file); // MultipartBody.Part is used to send also the actual file name return MultipartBody.Part.createFormData(partName, file.getName(), requestFile); } - In the last, you need to add Runtime Permissions Request to run the app in Android 6 and above
- Now run your app and upload multiple files (images, videos, songs, and other files...)


Download Full Project
Download Project
Enter your email to unlock the download.